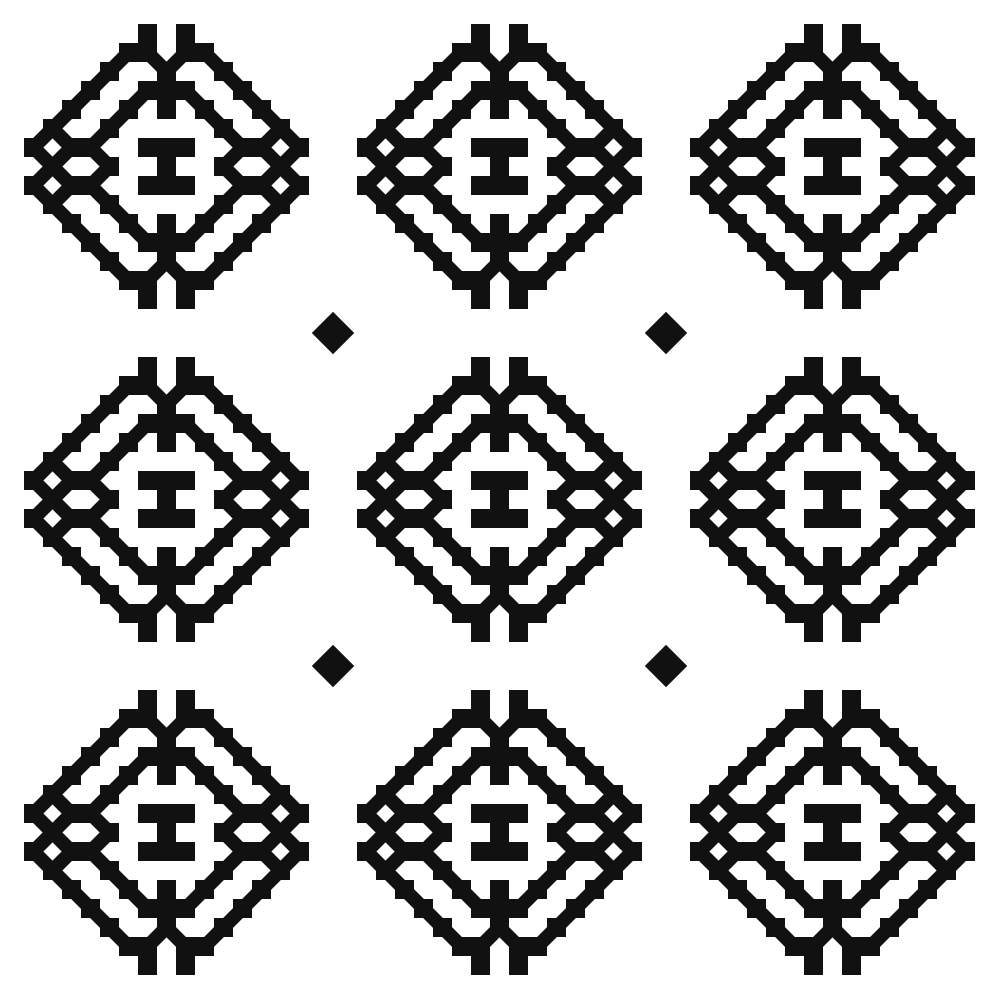
About this stencil
The eight-point star in this pattern is the oldest motif in Scandinavian knitting, the one on every Norwegian jumper and most Christmas stockings. We drew it as a 15 by 15 pixel grid, each pixel 4mm at A4, so it keeps the stepped, stitched look that the smooth vector versions lose. Three stars across and three down fill a sheet, with a small diamond at each junction to break up the gaps.
The important thing about a repeating stencil is what happens at the edges. The stars sit exactly one tile width apart, so when you butt a second print against the first the spacing stays constant and the diamonds land in the right place. In practice, lining up the outermost star on each side is enough to keep the repeat true.
Where the pixels in the star touch only at their corners, we joined them with a small 45 degree bridge so each diagonal cuts as one continuous slanted hole rather than a chain of squares. It means the stencil has no zero-width bridges and can be cut by hand from card, although the number of cuts means a cutting machine is faster.
Best surfaces & materials
Repeats come into their own on surfaces where you need to cover an area. These are the ones this pattern suits.
| Surface | Recommended paint | Notes |
|---|---|---|
| Cotton and linen fabric | Fabric paint, stencil brush | Print at 100%. Heat-set. Wash the fabric first so the paint bonds. |
| Kraft wrapping paper | White or red acrylic, foam roller | Print at 100% and repeat along the roll. Fast and striking. |
| Feature wall | Chalk paint, dense foam roller | Print at 100% and work in rows. Run tape along the top edge to keep rows level. |
| Table runners | Fabric paint, light sponge | One row of three stars down the centre at 100%, or the full tile at 70%. |
| Cards | Ink pad | Print at 30%. One star on a small card, or the full tile for a bigger one. |
How to use this stencil — step by step
Repeating a stencil is mostly about alignment. The painting is the same as any other stencil; the extra work is in the setup.
- Print one copy at 100% and cut it. Cut the diagonal runs in one continuous stroke each; the bridges are already in the design.
- Mark the corners of the first placement lightly in pencil before you lift the stencil.
- Tape the stencil at all four corners. Repeats are more sensitive to shifting than single designs.
- Roll or pounce with an almost dry applicator. The pixels are small, so wet paint spreads and fills them.
- Lift and move to the next position so the stencil edge butts against the previous one. Check the diamonds are evenly spaced.
- For fabric, let the whole piece dry for 24 hours and heat-set on the reverse before washing.
Keep the rows level: on a wall, snap a chalk line or stick a strip of low-tack tape along the top edge of the first row and work along it. A row that drifts by even 3mm shows clearly in a cross-stitch pattern, because the eye expects the grid to be perfect. The tape costs nothing and saves a repaint.
Project ideas for this design
Anything with a surface area. The pattern is at its best when it covers enough ground for the repeat to show.
Scandi gift wrap
White stars on brown kraft paper, rolled along the sheet. Tie with red twine. It is the one people ask where you bought it.
Stencilled cushion
One full tile at 100% in white fabric paint on red or charcoal linen. Heat-set and it washes for years.
Hallway feature wall
White chalk paint on a deep red or green wall, three rows high behind a console table.
Christmas table runner
A single row of stars down the centre of a white runner, with diamonds between.
Advent sacks
One star at 50% on each of 24 small calico bags, numbered with our letter stencils.
Related stencils you might like
Frequently asked questions
How do I line up the second sheet?
Butt the edge of the stencil against the edge of the first print, using the pencil marks you made at the corners. The stars are spaced exactly one tile apart, so if the outer stars line up the rest of the pattern will.
Why are the diagonals joined by little bridges?
In a true cross-stitch chart the diagonal cells only touch at their corners. As a stencil, that leaves a bridge of zero width, which tears. We added a small 45 degree link between diagonal cells so each run cuts as one slanted hole with proper material either side.
Can I cut this by hand?
Yes, but it is roughly 90 separate cuts per tile. Card with a new blade works; a cutting machine takes under a minute and gives cleaner corners. If you are hand cutting, cut only the centre star first and repeat that nine times instead.
Does it work on knitted or textured fabric?
On smooth cotton or linen, yes. On knit or coarse hessian the 4mm pixels blur into the texture; print at 150% or more so each pixel clears the weave.